2 minutes
Dont Blindly Upgrade Your 3d Printer
So, I have to admit, I’ve been somewhat frustrated with my printer recently. If you have read any of my blogs, you will know that I’ve added a few upgrades from glass beds to silent boards. I’ve also printed upgrades like bed strain arms, power cable reliefs etc. However, it felt like no matter what I did, I could not get the first layer to adhere to the bed. I did notice that when prints failed they always did so on the right. In entirety, I think I have wasted about 25% of my current filament roll to a lack of adhesion.
Well, that all ended today when I found a new plugin for OctoPrint called Auto Bed Levelling Visualiser. This plugin offers a way to probe your bed and produce a chart of the results. This is the first image I generated: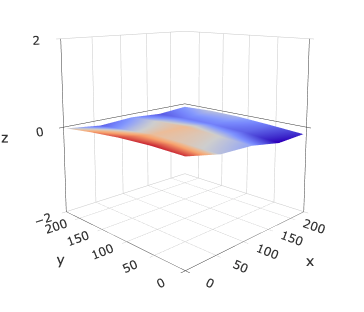
Bed level graph before
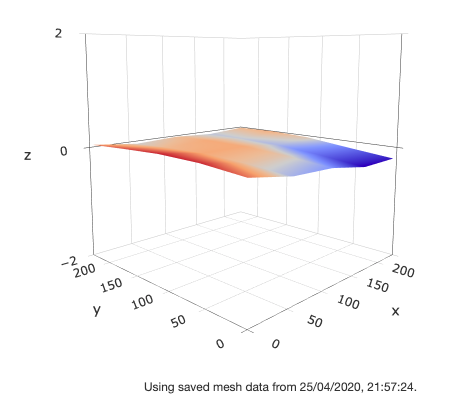
Bed level graph after
The valuable lesson that I learnt here is; don’t blindly add upgrades to your printer. Use upgrades to solve problems that you have, don’t just add them because they’re on Thingyverse and for your printer.